


Email marketing remains one of the most effective ways to connect with your audience, promote products, and build lasting relationships. For businesses looking to harness this power, Brevo (formerly Sendinblue) offers a robust, user-friendly platform that combines email marketing, automation, and more. Whether you’re a small business owner or a seasoned marketer, Brevo’s intuitive tools and AI-driven features make it easy to create impactful campaigns.
In this comprehensive guide, we’ll walk you through the process of setting up your first email marketing campaign with Brevo, highlighting its standout features and best practices to ensure success.
Why Email Marketing Matters
Email marketing delivers a high return on investment, with studies suggesting it can generate $42 for every $1 spent. It allows businesses to:
- Engage Directly: Reach customers in their inboxes, fostering personal connections.
- Personalize Content: Tailor messages to specific audience segments for better engagement.
- Track Performance: Measure open rates, clicks, and conversions to refine strategies.
- Drive Sales: Promote products, announce sales, or recover abandoned carts.
Brevo enhances these benefits with its all-in-one platform, offering email, SMS, chat, and automation tools to streamline your marketing efforts.
Why Choose Brevo?
Brevo stands out in the crowded email marketing landscape for several reasons:
- Ease of Use: Its drag-and-drop editor and intuitive dashboard are beginner-friendly, requiring no technical expertise.
- AI-Powered Tools: Brevo’s AI assistant, Aura, generates subject lines, optimizes send times, and provides campaign insights.
- High Deliverability: With a 99% deliverability rate, Brevo ensures your emails reach the inbox, not the spam folder (Brevo Email Marketing).
- Automation: Create workflows for welcome emails, abandoned cart reminders, and more.
- Scalability: Flexible plans, including a free option with 300 daily emails, cater to businesses of all sizes.
- Multi-Channel Support: Integrate email with SMS, WhatsApp, and live chat for a cohesive strategy.
With over 2,000 positive reviews and integrations with 150+ digital tools, Brevo is trusted by businesses worldwide to drive growth (Brevo Platform).
Step-by-Step Guide to Setting Up Your First Campaign
Follow these steps to create and launch your first email marketing campaign with Brevo.
Step 1: Sign Up and Set Up Your Account
- Visit Brevo’s website and click “Sign Up.”
- Enter your email address and organization name to create an account.
- Verify your email to access the dashboard.
- Set up your sender profile using a professional email address (e.g., yourname@yourdomain.com) to improve deliverability. Avoid free email providers like Gmail or Yahoo (Brevo SMTP Guide).
Note: Brevo’s free plan allows you to send up to 300 emails per day to unlimited contacts, making it ideal for beginners.
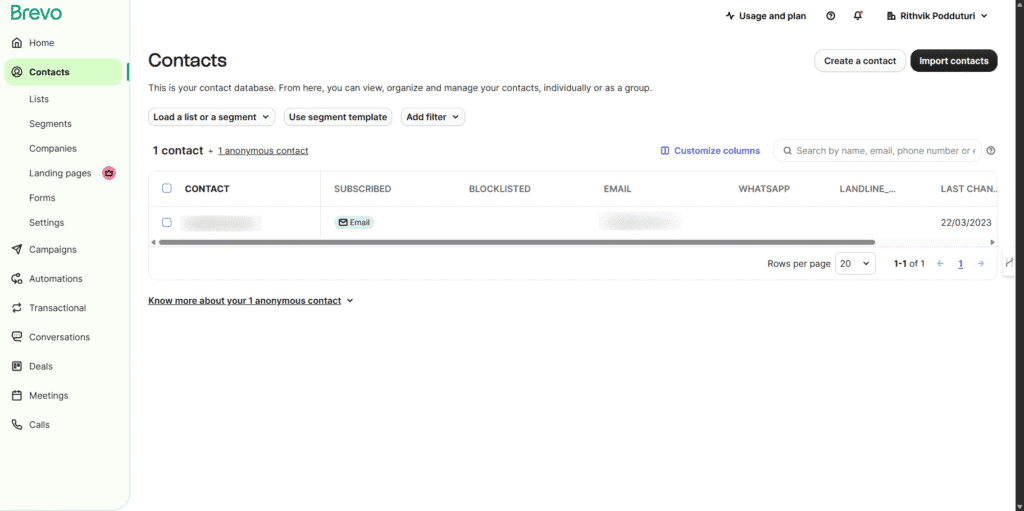
Step 2: Import or Create Your Contact List
A successful campaign starts with a quality contact list. Brevo supports both manual entry and bulk imports.
- Import Contacts:
- Navigate to Contacts > Manage contacts > Import contacts.
- Upload a CSV file with email addresses and optional fields like names or custom attributes.
- Map the CSV fields to Brevo’s contact attributes.
- Create Contacts:
- Add contacts manually via Contacts > Add a contact.
- Use Brevo’s customizable signup forms to collect new contacts from your website or landing pages.
Compliance Tip: Ensure all contacts have given explicit consent to receive your emails, adhering to regulations like GDPR and CAN-SPAM. Consider using a double opt-in process to verify subscriptions (Brevo Deliverability Best Practices).
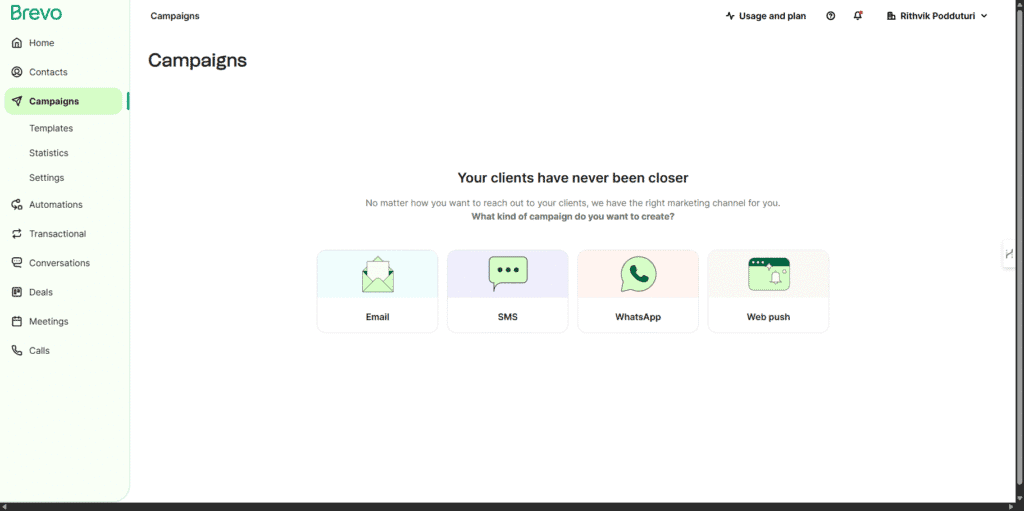
Step 3: Create Your Email Campaign
- Go to Campaigns > Email in the Brevo dashboard.
- Click Create an email campaign.
- Select Regular email campaign for a standard campaign. (For testing variations, choose A/B Test email campaign later.)
- Name your campaign for easy identification (this is internal only).
- Click Create campaign to enter the setup page (Brevo Campaign Creation).
Step 4: Configure Campaign Details
On the setup page, you’ll define the key elements of your campaign:
- Sender:
- Click Select sender or Manage sender.
- Choose an existing sender or create a new one with a professional email address.
- Customize the sender name using contact attributes (e.g., “From: [First Name] at YourCompany”).
- Recipients:
- Click Add recipients.
- Select one or more contact lists or segments from the dropdown.
- Optionally, exclude unengaged contacts or set frequency caps to avoid over-emailing.
- Subject Line:
- Click Add subject and write a concise, engaging subject line.
- Add a preview text to give recipients a glimpse of the email’s content.
- Use Brevo’s AI assistant to generate catchy subject lines (Brevo Email Features).
- Email Content:
- Click Start designing.
- Use the Drag & Drop Editor to build your email from scratch or select from 40+ responsive templates.
- Alternatively, code your email in HTML or upload an HTML file for advanced customization.
Table: Campaign Setup Checklist
| Step | Action | Notes |
|---|---|---|
| Sender | Choose or create a sender profile | Use a professional email address for better deliverability |
| Recipients | Select contact lists or segments | Exclude unengaged contacts to improve engagement |
| Subject Line | Write a compelling subject line and preview text | Leverage Brevo’s AI for optimization |
| Email Content | Design using drag-and-drop editor or HTML | Ensure mobile responsiveness |
Step 5: Personalize and Customize
Personalization boosts engagement by making emails feel tailored. Brevo allows you to:
- Insert contact attributes (e.g., “Hi [First Name]!”) in the subject line or body.
- Add dynamic content, such as product recommendations or recent blog posts, based on user behavior.
- Segment your audience by demographics, purchase history, or engagement levels for targeted messaging.
For example, an e-commerce business could send personalized product suggestions to customers who recently browsed specific categories.
Step 6: Preview and Test
Before sending, verify that your email looks and functions correctly:
- Use Brevo’s Preview feature to check how the email appears on desktop and mobile devices.
- Send test emails to yourself or team members to review links, images, and formatting.
- Check for compliance with Gmail and Yahoo’s sender requirements, effective February 2024 (Brevo Getting Started).
Best Practice: Testing ensures your email is error-free and optimized for all devices.
Step 7: Schedule and Send
Choose how and when to send your campaign:
- Send Now: Launch the campaign immediately.
- Schedule for Later: Set a specific date and time for delivery.
- Send at Best Time: (Business plan) Brevo’s AI determines the optimal send time for each contact based on engagement patterns.
- Send in Batches: (Enterprise plan) For large campaigns, send emails in batches to manage deliverability.
Note: For campaigns with over 2 million recipients, batch sending is available with a maximum 24-hour interval between batches.
Step 8: Analyze and Optimize
After sending, monitor your campaign’s performance using Brevo’s analytics dashboard:
- Track open rates, click-through rates, conversions, and bounce rates.
- Identify trends, such as which subject lines or content resonated most.
- Use A/B testing to experiment with different designs, subject lines, or send times.
Brevo’s real-time statistics and AI insights help you refine future campaigns for better results (Brevo Automation).
Best Practices for Email Marketing Success
To maximize your campaign’s impact, follow these best practices:
- Segment Your Audience: Target specific groups based on behavior, preferences, or demographics.
- Personalize Content: Use names and dynamic content to make emails relevant.
- Optimize for Mobile: Ensure emails are responsive, as over 50% of emails are opened on mobile devices.
- Test Regularly: Experiment with A/B tests to find what works best.
- Maintain Compliance: Use double opt-in and provide clear unsubscribe options to adhere to regulations.
- Avoid Spam Triggers: Use clean contact lists and avoid spammy words in subject lines.
Advanced Features to Explore
Brevo offers a suite of tools to take your marketing to the next level:
- Marketing Automation: Set up workflows for welcome series, birthday emails, or abandoned cart reminders (Brevo Marketing Platform).
- Multi-Channel Engagement: Combine email with SMS, WhatsApp, or live chat for a cohesive strategy.
- AI Insights: Leverage Aura to analyze performance and suggest improvements.
- Integrations: Connect Brevo with 150+ tools, including CRMs, e-commerce platforms, and CMS.
Table: Brevo Plan Comparison
| Feature | Free Plan | Starter Plan | Business Plan |
|---|---|---|---|
| Daily Email Limit | 300 emails | 5,000+ emails | Customizable |
| Automation | Basic (up to 2,000 contacts) | Advanced | Advanced + lead scoring |
| AI Features | Limited | Basic AI tools | Full AI (Aura) |
| Branding | Brevo branding included | Optional removal ($12/month) | No branding |
| Price | Free | From $9/month | Custom pricing |
Conclusion
Setting up your first email marketing campaign with Brevo is a straightforward process that empowers you to connect with your audience and drive business growth. From its user-friendly editor to its AI-powered tools and high deliverability, Brevo provides everything you need to succeed in email marketing. By following the steps outlined above and adhering to best practices, you can create engaging, personalized campaigns that deliver results.
Ready to start? Sign up for a free Brevo account today at Brevo’s website and launch your first campaign!